How To Change Chair Cover
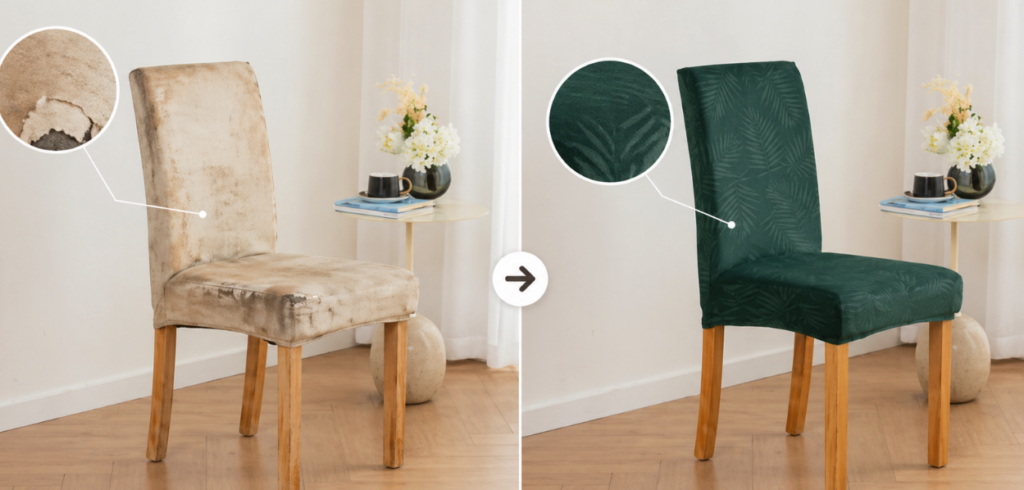
If you want to make your old chair look brand new, there is no need to send it to the factory for a big job. I only changed the cover of the chair. As long as the technique is correct, the effect can be completely comparable to the smoothness of professional customization.
Many people complain that the chair covers they put on are always loose and sagging. In fact, the problem is mostly in the operating details. The key to achieving that skin-like firmness without wrinkles lies in the set I’m going to talk about below “plug-and-seam fixation”.
Step 1: Identify The Direction And Preliminary Position
Many people struggle for a long time and find that the cover is reversed, and the fabric won’t pull smoothly no matter how hard they try.
- Get it right “back”: Most high-quality stretch chair covers have a small label sewn on the inside edge that says “Back”.
- Key points of action: First find this label to determine the rear, stand behind the chair, and put the cover on the top of the backrest first.
- Balanced force: Slowly pull the fabric down along the backrest. Here is a detail, both hands should be evenly pressed, pulling and straightening at the same time to prevent the fabric from accumulating or being pulled crooked on one side.
Step 2: Align The Sutures And Find The Right Ones “Custom Feel”
This is the watershed that separates “street stall goods” from “premium goods”. For that professional feel of a tight fit, you have to keep your eyes on the stitching.
- Angular alignment: When pulling the fabric down, be sure to make sure the seams of the cover precisely coincide with the four corners of the chair back and seat cushion.
- Experience: As long as the seams are slightly off, the “loose feeling” will come out when the light shines. Before moving on to the next step, apply an overhand smoothing to ensure that all fabric on large flat surfaces is taut.

Step 3: Stitching Technique
This is also the most overlooked step by everyone, directly determining whether the cover will “collapse” when you sit down.
- Deep pressure seam: When the cover covers the seat cushion, there will definitely be excess fabric at the junction of the backrest and seat cushion. Leave it alone and press the excess material into the deep crevices of the chair with your hands.
- Foam Stick Reinforcement: This is a real trick——stuffing foam sticks or cardboard tubes into the gaps. This thing acts like an anchor, locking the fabric in place and maintaining that smooth, sleek finish no matter how you sit.
Step 4: Bottom Frame Reinforcement
The final step is to ensure that the cover does not shift during daily use. The current Parsons chairs or common dining chair covers usually had rubber bands or straps on the bottom.
- Flip the chair: Don’t be lazy and flip the chair on its side or just turn it upside down to reveal the wooden frame at the bottom.
- Tighten the straps: Pull the straps to their tightest position and secure with a cross knot. The tension created by this step is key to eliminating the last tiny wrinkles on the surface and also ensures that the cover doesn’t rub against you when you move the chair.
Why Is This Method More Reliable?
I prefer this method to traditional cladding which requires the use of an air nail gun because it does not damage the furniture and is very flexible.
- Instantly hide the ugliness: Whether it is old stains or wear, it can be put on to look bright.
- Extremely durable: As long as it is put on tightly enough, the friction between the fabric and the chair will be reduced, and the life will naturally be longer.
- Extremely low maintenance: Because it is not fixed with nails, it can be removed and thrown into the washing machine in seconds when it gets dirty.
As long as you follow this process of positioning, alignment, and plugging, even the most basic dining chair can instantly create the déjà vu of high-end furniture.
Author: Marcus Reed
“Hi, I’m Marcus Reed. With years of experience in furniture renovation and home styling, I specialize in breathing new life into old pieces without the high cost of professional upholstery. I believe that with the right ‘plug-and-seam’ techniques, anyone can achieve a high-end, custom look at home.”